Setting Up Email Through Your Gmail Account
In order to setup your Gmail account to use your business email, it is required that the email account has already been created in your Control following Panel. The step-by-step instructions provided below will require the information.
Required Information
•Username
use whatever password you were assigned
•POP Server
mail.yourdomain.com (replace
yourdomain.com with your domain name)
•SMTP Server
mail.yourdomain.com (replace
yourdomain.com with your domain name)
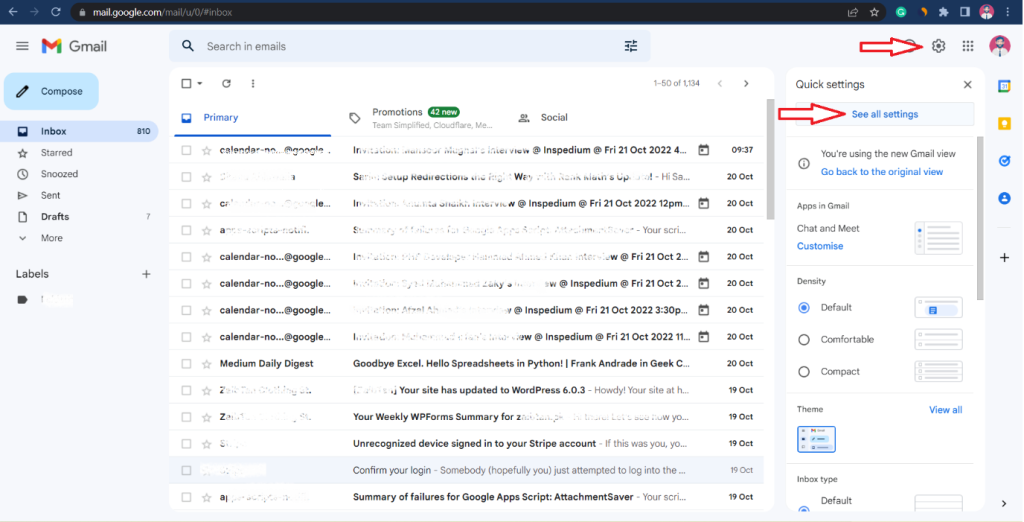
Step 1 – Log in to Gmail and go to Settings
1.Log in to your Gmail account.
2.Click the gear icon in the top right corner.
3.Select See all settings from the drop-down menu.
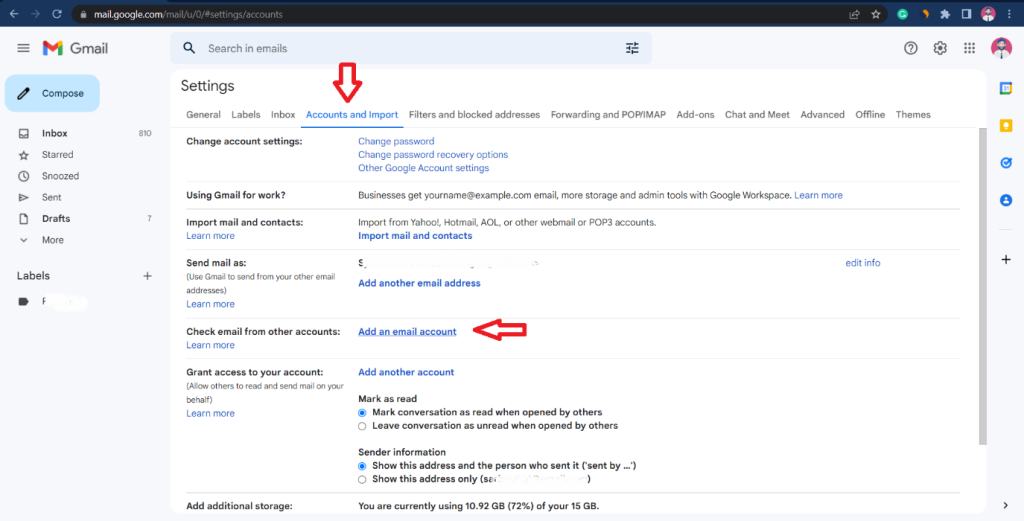
Step 2 – Add an email account
1.Click Accounts and Import in the menu at the top.
2.Click Add a mail account.
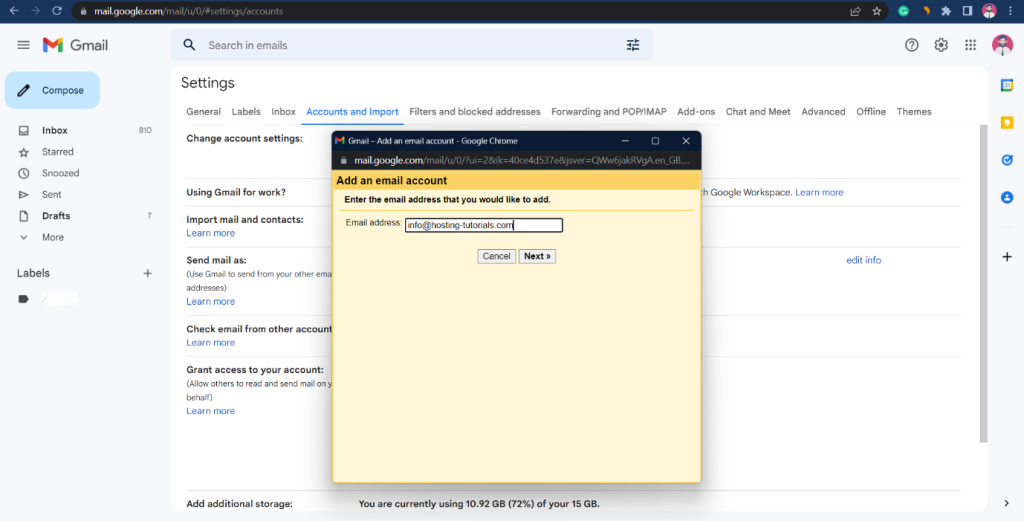
Step 3 – Enter your email address
1.Type in the email address you want to set up in Gmail.
2.Click Next.
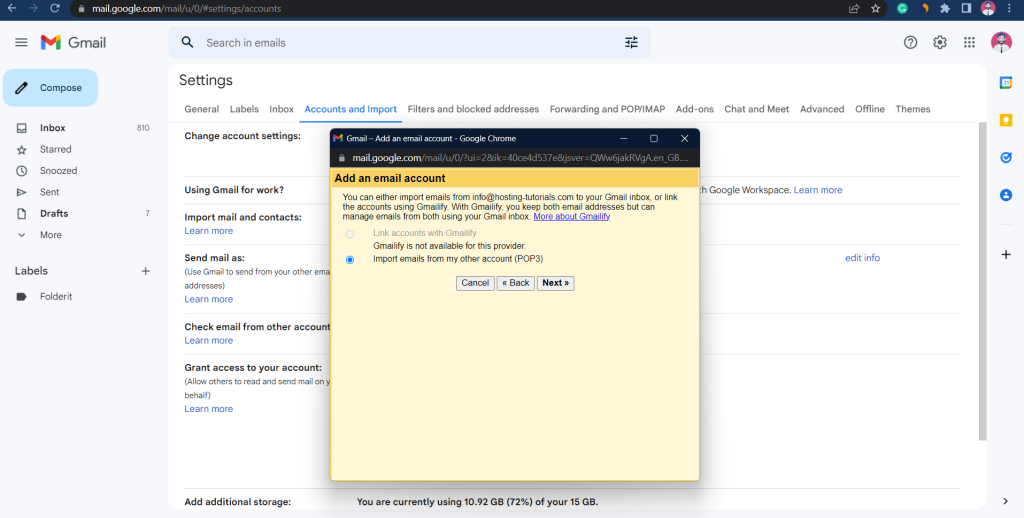
Step 4 – Confirm you want to import with POP
1.Select “Import emails from my other account (POP3)”.
2.Click Next
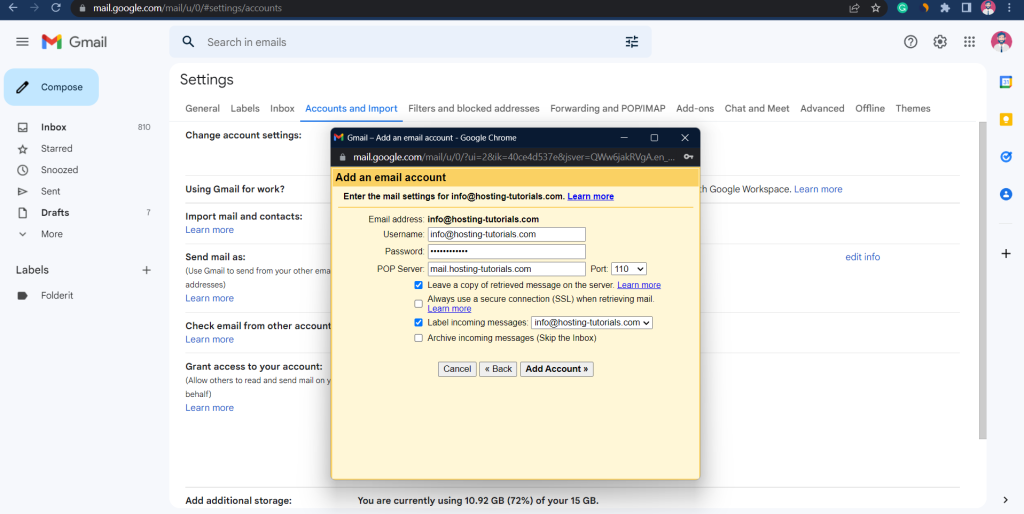
Step 5 – Enter the POP server settings
Please use the following settings for the incoming email:
• Username: your email address
• Password: the password you use to log in to Webmail
• POP server: shaikhsaadi.corpservers.net
• Port: 995
•Check the option to “Leave a copy of retrieved message on the
server”. (Recommended).
•Check the option to “Always use a secure connection (SSL) when
retrieving mail”.
Click Add Account to continue.
Tip: We recommend you check the option to leave a copy of your emails on
the server so that you can still access your emails in Webmail.
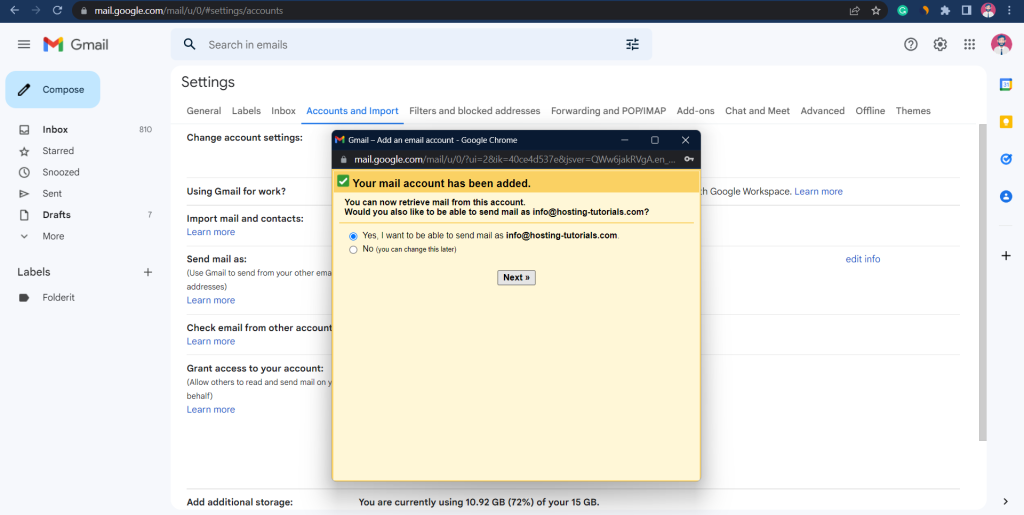
Step 6 – Confirm you want to send from Gmail
You can now receive emails from your email account in Gmail. The next step is to set up the outgoing settings so that you can also send emails from your account.
1.Select “Yes, I want to be able to send mail as..”
2.Click Next.
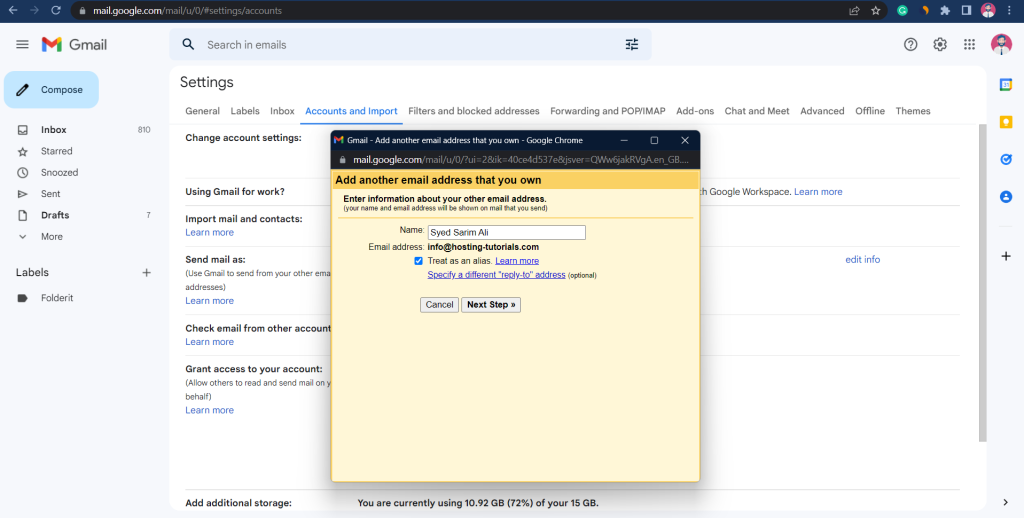
Step 7 – Enter the sender’s name
1.Enter the sender name you want to be visible to your recipients.
2.Click Next step.
TIP: Advice: If your primary email address is your Gmail address, and your secondary email address is only utilized for receiving messages, it is recommended that you select the “Treat as an alias” option.
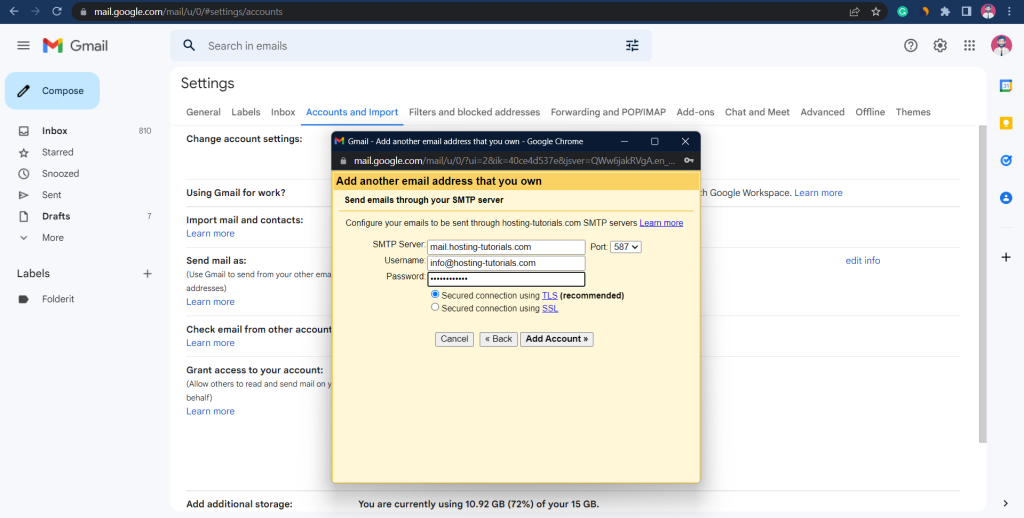
Step 8 – Enter the SMTP server settings
Please use the following settings for the outgoing email:
• SMTP Server: shaikhsaadi.corpservers.net
• Username: your email address
• Password: the password you use to log in to Webmail
• Port: 587
• Secured connection: TLS
Click Add Account to continue.
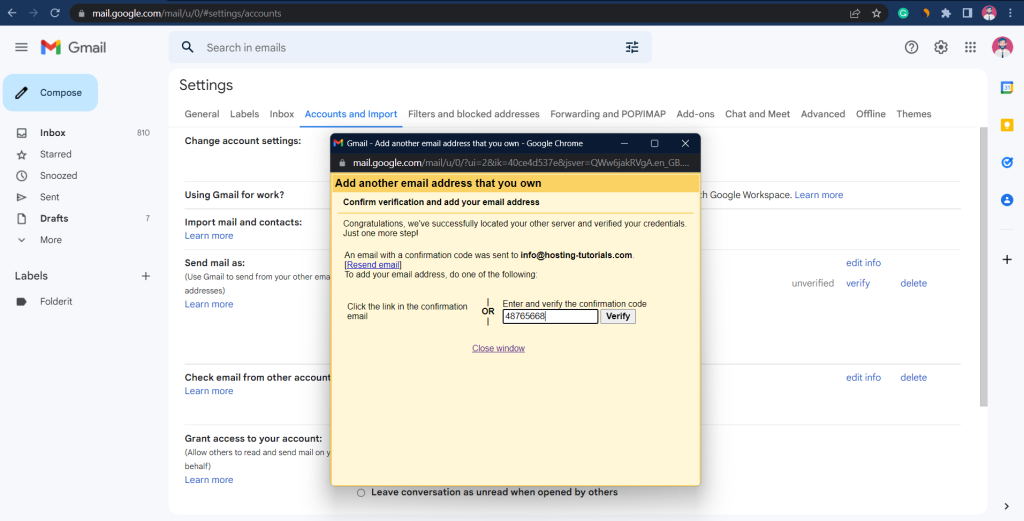
Step 9 – Open the Gmail Confirmation email
Gmail will now send you an email with a confirmation code.
1.Log in to Webmail.
2.Open the email “Gmail Confirmation – Send mail as…”
3.Copy the confirmation code in the email.

Step 10 – Enter the verification code
Paste the verification code in the field and click Verify
Step 11 – Verify your settings
Your account is set up. You can now both send and receive emails in Gmail.
Check your settings to make sure it’s set up according to your preferences.

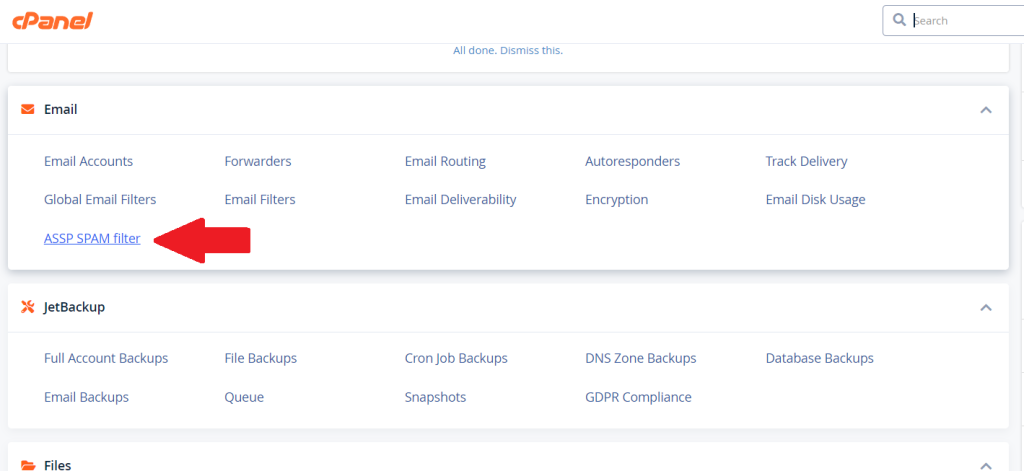
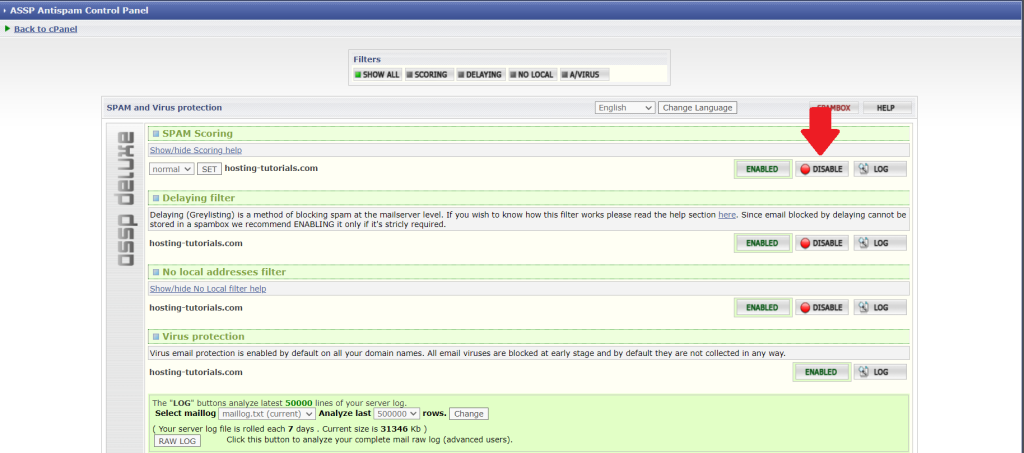
TIP for Spam Filtering:
To use only the gmail spam filter you need to disable ASSP filter for better
results.
1.Go to your Cpanel
2.Click on ASSP Spam Filter