CalDAV Synchronizer Setup
To synchronize CalDAV / CardDAV with Outlook, one can utilize the caldavsynchronizer, an Open Source plugin that is installed on a computer and integrated with Outlook. Compatible with Outlook 2007 to Outlook 2016, this plugin is Free and Open-Source Software (FOSS) and is licensed under AGPL 3. It is developed by Alexander Nimmervoll and Gerhard Zehetbauer, and the project is accessible on Github and SourceForge.
This is a step-by-step guide to installing and setting up the caldavsynchronizer plugin.
Download the caldavsynchronizer
You can download the caldavsynchronizer plugin from the project’s website: https://caldavsynchronizer.org/.
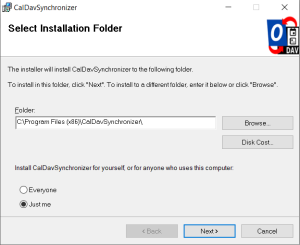
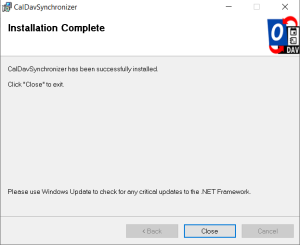
Install the caldavsynchronizer
Extract the downloaded .zip file and start the installation. Once the installation is complete, you will see a new ribbon called “CalDav Synchronizer” in your Outlook.

Get your CalDAV / CardDAV URLs
First, you need to obtain your CalDAV / CardDAV URLs. CalDAV is for Calendar synchronization, and CardDAV is for Contacts.
Go to the Webmail
Log in using your full e-mail address and your current e-mail password
Click on the User icon from the top right to activate the menu. Then click on My account
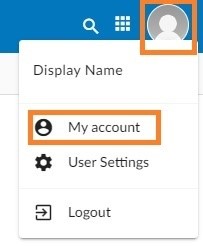
In the Synchronization tab, find the CalDAV / CardDAV URL. You will need to copy and use these URLs with the caldavsynchronizer.

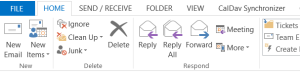
Set up the caldavsynchronizer
Open Outlook on your computer.
Go to the CalDav Synchronizer ribbon. Click on the Synchronization
Profiles option.

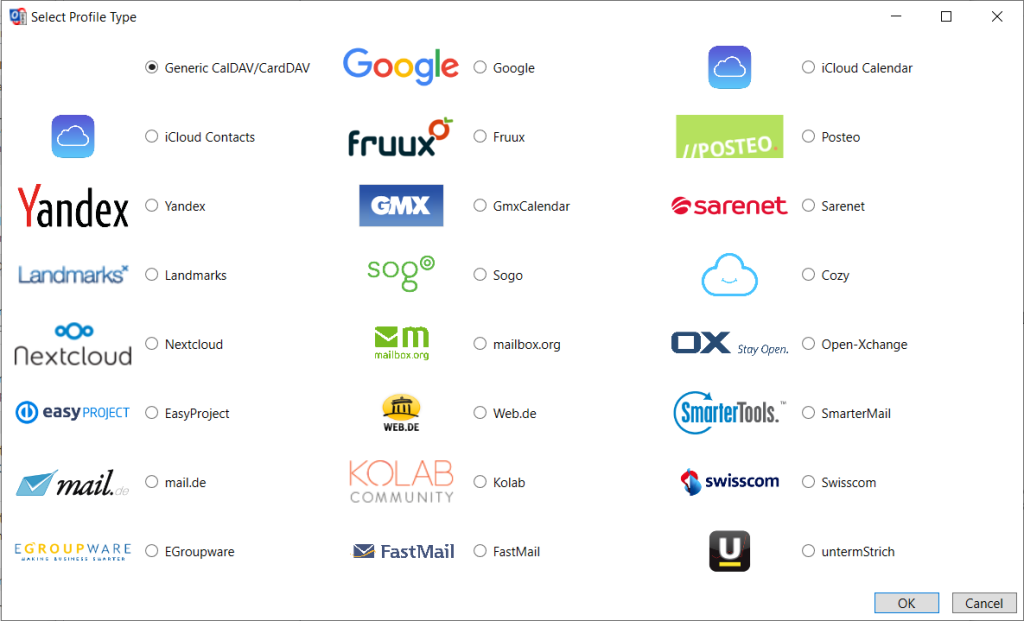
Click on the Add button (plus sign) to set up a new Calendar or Addressbook to sync. Select the profile type Generic CalDAV/CardDAV.
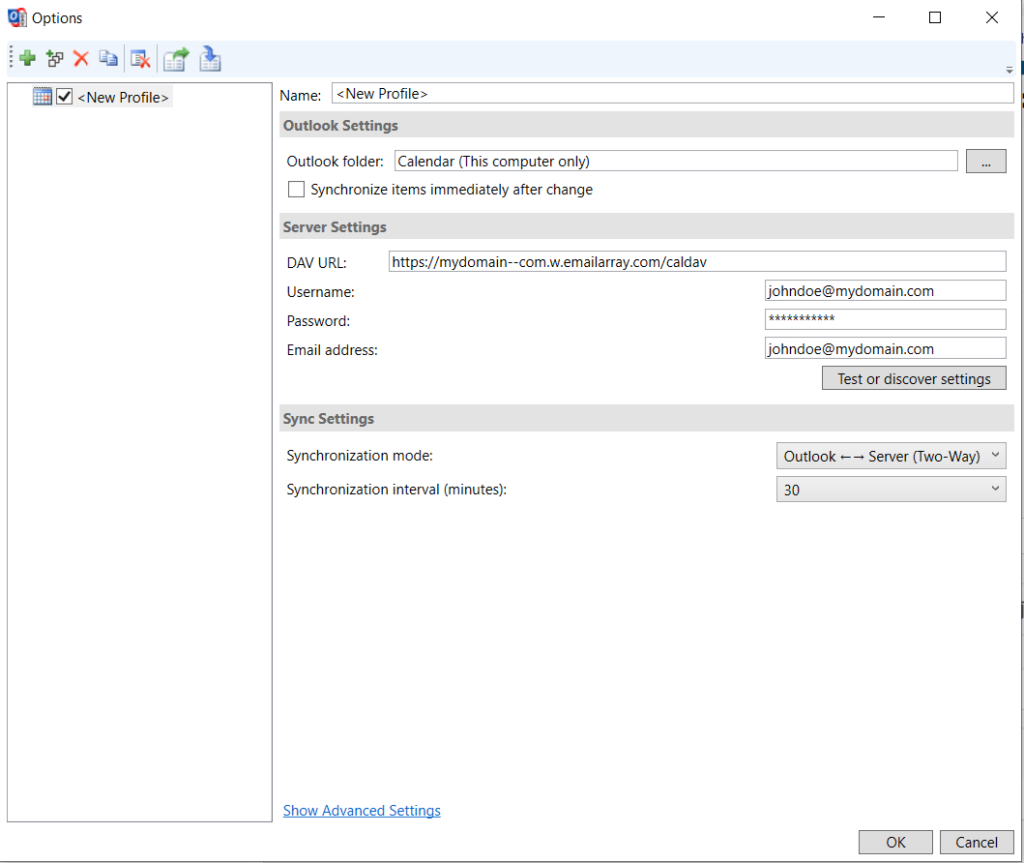
• A new profile window will show. Fill in the following details:
•Name: give a name to this profile. For example, Calendar – personal,
or Calendar – work.
•Outlook folder: create a new folder in the Calendar
Items or Contact Items category. You can also choose an existing
Calendar or Contact folder.
•Server Settings: these are your CalDAV / CardDAV details:
•DAV URL: if you’re adding a Calendar, use the CalDAV URL
obtained from the Webmail at step 3. This URL should be in
the form of https://mydomain–com.w.emailarray.com/caldav –
be sure to replace mydomain–com with your own domain
name. If you’re adding a Contact list, use the CardDAV URL.
•Username: your full name
•Password: your email password
•Email address: your full email address
•Click on the Test or discover settings button. If you have
multiple Calendars (or Contact lists) you can choose which
one of them to sync with this Profile.
•Sync Settings: choose how and how often to synchronize the
Profile. We recommend the Outlook ↔ Server (Two-Way)
synchronization mode.
•After you finish the setup, you can choose to synchronize items
immediately after change by ticking the option in the Outlook
Settings. Please note you can only activate this option after you
have finished the above setup and clicked on the Test or discover
settings.
•Click on the OK button to finish setup and save changes
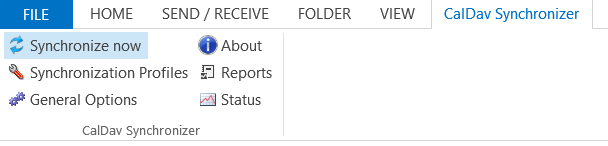
Synchronize your new Profile
If the synchronization didn’t start automatically, you could manually sync by
going to the CalDAV Synchronization ribbon in Outlook and clicking
the Synchronize now option.
You can now set up a new Calendar or Contact list by adding a new Profile (step 4).